HyperDrive Pro simplifies the rental agreement process into three main steps:
- Customer & Vehicle
- Vehicle Inspection
- Terms & Conditions
Rental agreements also include payment options for placing a preauthorization hold and collecting rental charges up front.
Starting a New Rental Agreement- Log in to your Logitrac account using your provided credentials.
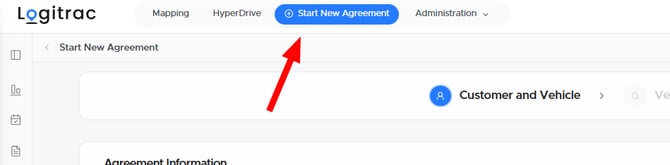
- Select Start New Agreement from the navigation bar at the top of the screen.
- Choose Rental Agreement as the agreement type.
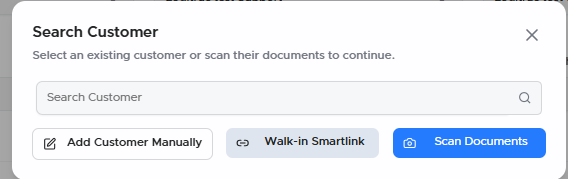
You can begin the agreement using one of the following options:
- Add Customer Manually: Enter the customer’s information manually.
- Walk-In SmartLink: Send the customer a SmartLink to enter their information from their own device.
- Scan: Scan the customer’s documents to automatically populate available fields.
If the customer already has a profile in Logitrac, use the search bar to locate and select the existing customer instead of creating a duplicate profile.
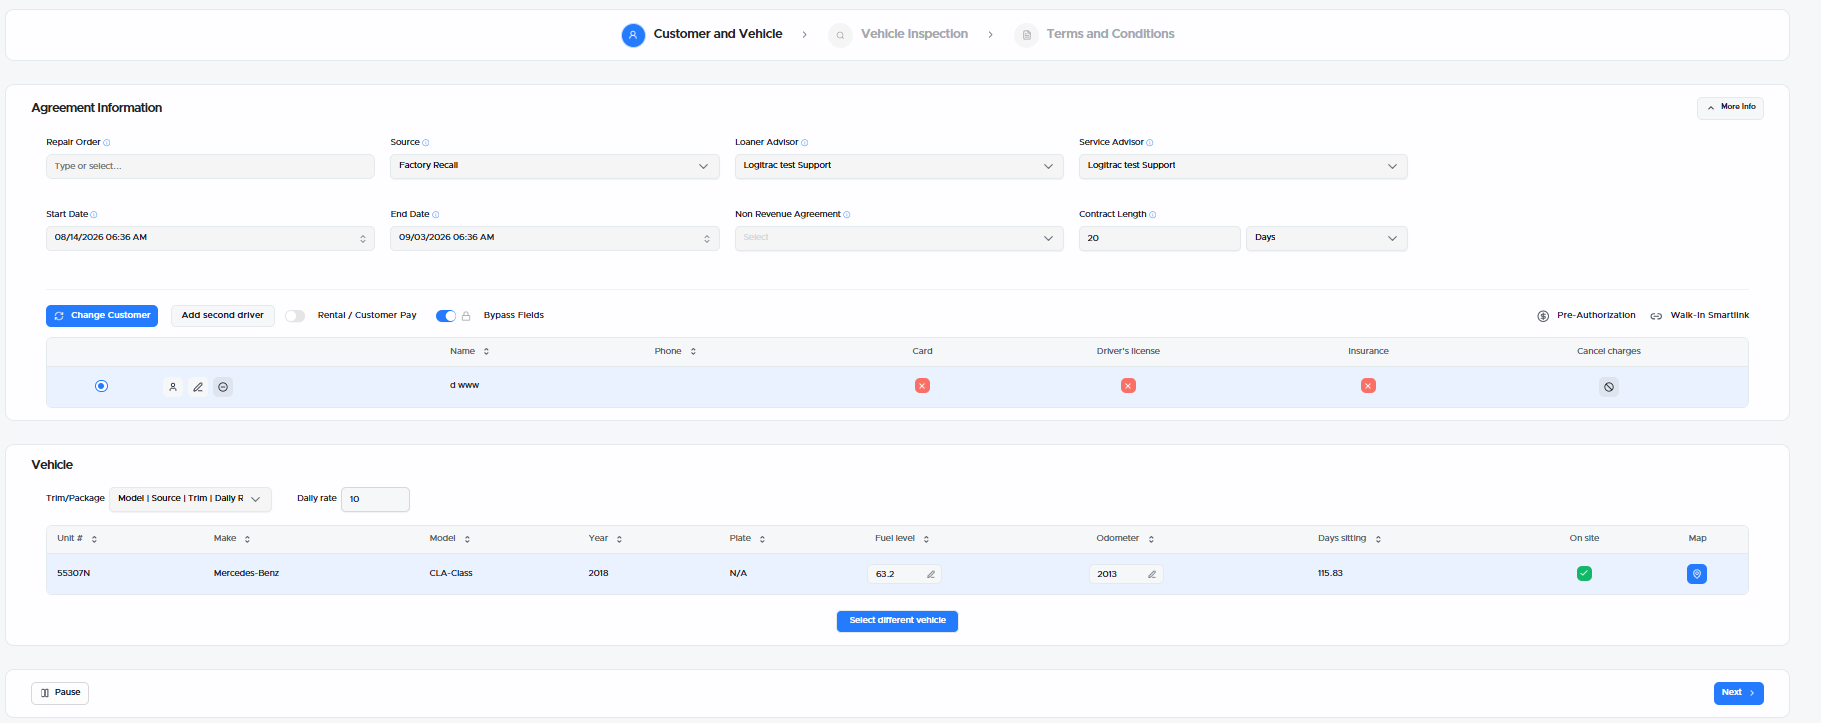
The first step combines customer information, rental details, payment authorization, and vehicle selection.
Entering or Scanning Customer Information
When using the Scan option, scan the customer’s documents in the following order:
- Driver’s license barcode
- Front of the driver’s license
- Insurance card
- Credit card
A picture displayed on the customer’s phone may also be used when scanning an insurance card.
Logitrac does not save an image of the customer’s credit card. The card scan is used to capture the required card information and reduce manual entry.
Use clear, well-lit images for each document. Blurry, dark, obstructed, or incomplete images may prevent information from being captured correctly.
After scanning or entering the customer’s information:
- Review all populated fields for accuracy.
- Complete any missing information.
- Complete all dealership-required fields.
- Save the customer profile.
Entering Rental Information
Complete the applicable rental information, including:
- Repair order number, when applicable
- Rental or service advisor
- Contract length
- Per-day rental rate
- Other dealership-required information
The selected contract length and per-day rate are used to calculate the expected rental amount.
Placing a Preauthorization Hold
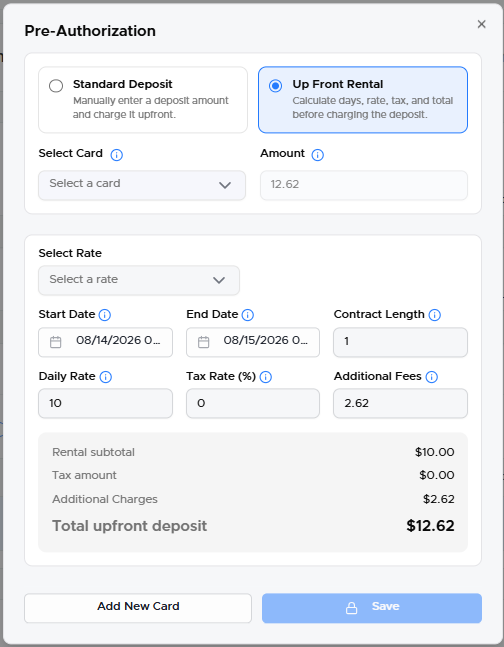
The Preauthorization option allows the dealership to place a temporary hold on the customer’s card before opening the rental agreement.
When selecting the Preauthorization option, you can choose between:
- Standard Hold: Places the dealership’s standard configured hold amount on the customer’s card.
- Rental Hold: Calculates the hold amount using the selected per-day rental rate and contract length.
For example, if the rental rate is $50 per day and the contract length is three days, the Rental Hold will calculate a hold based on the expected three-day rental amount.
The Rental Hold option is especially useful when collecting rental charges up front because it bases the authorization amount on the rental terms entered for the agreement.
A preauthorization is a temporary hold and is not the same as a completed charge. The customer’s available balance may be reduced while the hold remains active.
Selecting a Rental Vehicle
Use the vehicle search to locate the rental vehicle you want to assign to the customer.
- Search for the vehicle using the available vehicle information.
- Select the desired vehicle.
- Confirm that the correct vehicle is displayed as selected.
- Review and address any vehicle warnings before continuing.
If an odometer or tracking warning appears, verify the vehicle’s current mileage and confirm that its tracking device is reporting correctly.
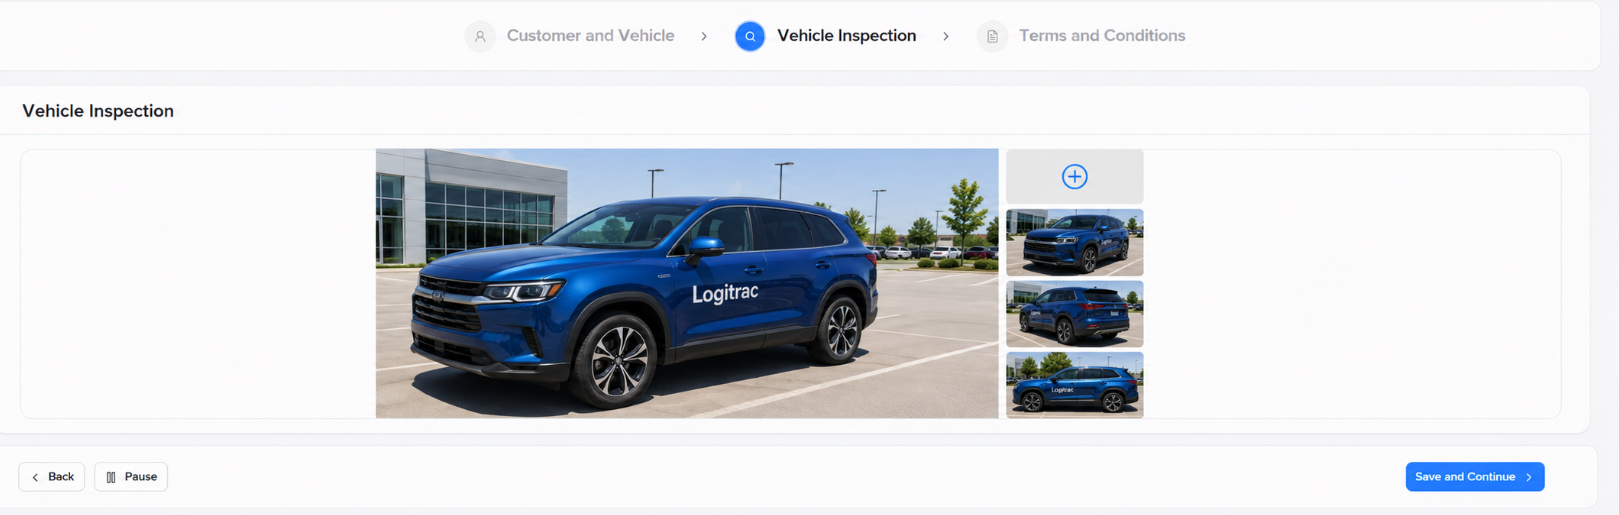
The second step allows you to document the condition of the rental vehicle before it leaves the dealership.
- Select Vehicle Inspection.
- Select the blue plus button to begin the inspection.
- Take clear photos of the vehicle and any existing damage.
- Review the photos before completing the inspection.
- Select Finish to upload the inspection photos to the agreement.
Documenting the vehicle’s condition before opening the agreement helps maintain an accurate record for both the dealership and the customer.
The final step allows the customer to review and accept the rental agreement.
- Select Terms & Conditions.
- Have the customer review the displayed agreement terms.
- Have the customer accept the terms and conditions.
- Collect the customer’s signature.
- Select Finish to complete and open the agreement.
The rental agreement is now open, and the selected vehicle is assigned to the customer.
Extending an Open Rental AgreementIf the rental period needs to be extended after the agreement has been opened, update the expected return date or contract length from the open agreement.
When additional rental days are added, HyperDrive Pro will ask when you want to collect the additional rental charges.
You can choose to:
- Charge the Additional Days Now: Collect the charges for the added rental days when the extension is completed.
- Charge at the End: Add the additional rental days to the agreement and collect the remaining amount when the agreement is closed.
Review the additional days and amount before confirming your selection.
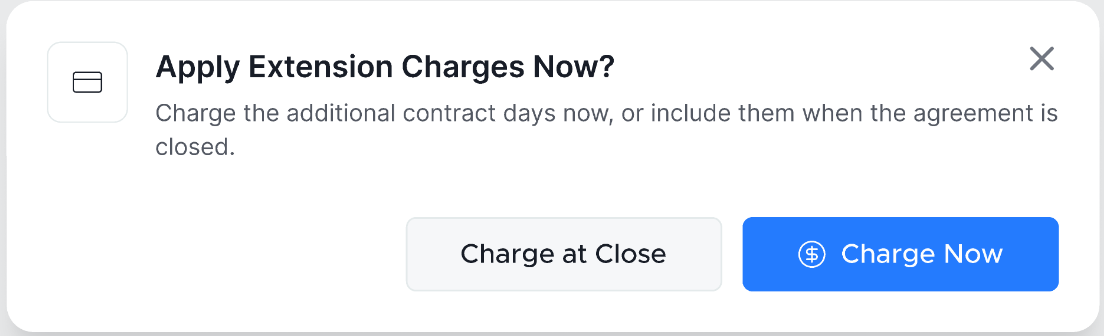
This allows the dealership to decide whether additional rental time should be paid up front or included in the customer’s final charges.